The first one is derived from what I've seen in some of the other pageants. It's two lights equal distant from each other. The one I'm showing here is probably too close to each other and should be further apart. I never use this so pardon the error.

The light is flat and non directional but has very little depth if any.

I thought if I lowered the power of one of the lights it may help in defining the depth. Helps a bit but to me, something is still missing.

Late last year, I saw an advertisement for an "Omega" reflector which was supposed to make it simpler to create a "glamour" light and the samples looked great. Purchased it, got it in and here is the setup that I use.

The main light is behind your subject and it's designed to be out of camera range and one stands in front of the reflector shooting through the opening in the reflector. The main light bounces off the reflector and acts as the light source.

It's ok but I have yet to tweak the positioning and light source to my satisfaction.
I needed more depth so I put a "kicker" light to the other side of the subject.

A little better but I now have to deal with flyaway hairs.

I've seen several posts/tutorials on utilizing one light at the 12 o'clock position to create the glamour light and another light below that with the photographer shooting between them to create a flat "glamour" light. I took two of my flash units, put a soft box on them and positioned them at 12 & 6 o'clock positions.

A lot better light than the side by side.

I like to have the hair illuminated so I usually try to insert a hair light but with only two lights, I opted to use a small reflector under the subject's face . The second light is placed behind the subject and high skimming the head. The light in the front blocks the hair light from spilling into the camera

Now we are getting a separation between the background and the head.

It looked fine but I lost some detail in the shadows. I switched to a larger reflector so I could get more light into the shadow area.


Getting better and if I add a background light, I'll be close to what I want. At this point I switched to my primary lighting system that I used this past year which was a beauty dish attached to a power pack power system vs. Monolights. I also added a Fill Light which was aimed against a white wall to get some base illumination. The Fill Light is bounced against the white wall in the background. I am also using a Beauty Dish vs. a Soft Box or Umbrella for the main light as I prefer the snap the Beauty Dish gives to the face illumination.

I also added a background light to separate the background from the subject. The big reflector is under the beauty dish.

Not bad but still needs a bunch of tweaks.

First thing is to add a hair light. I have one on a boom with a grid on the reflector to aim the light more accurately and I also added an amber colored filter to warm up the hair.

Another option is instead of the reflector, is to use a Strip Light in place of the reflector. This is placed under and in front of the subject.


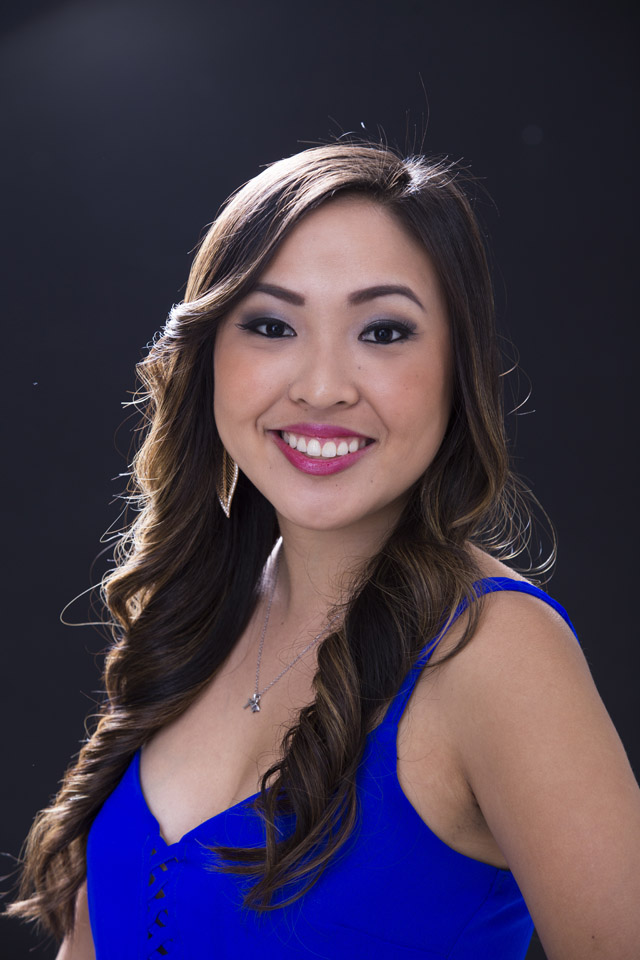
Add the hair light and we have:

The last image in this post uses (1) a Fill Light, (2) the Main Light - Beauty Dish, (3) the Hair Light on a boom behind subject, (4) the Background Light, (5) the Large Reflector and (6) a set of two Kicker Lights. The Reflector with the opening on the left side of the image is not in use.

It's what I may be doing this year depending on what kind of background is needed. And I'll deal with the loose hairs post production.

No comments:
Post a Comment